
Your custom Bauhaus Apparat is controlled by an electronic control system. This usually consists of some electronic hardware components (i.e. a microcontroller, motor-driver chips, a power supply, etc.) and the firmware (i.e. the code that runs directly on the hardware).
Hardware + Firmware
A growing variety of control boards (and specific firmware for these boards) are available. For low-cost and entry-level standalone builds, the RAMPS (“RepRap Arduino Mega Pololu Shield”) in combination with an optional display board (such as the RepRapDiscount Full Graphic Smart Controller) has proven to be a robust solution. Ramps works nicely with the Marlin firmware.
Ramps Assembly
Assembling the electronics is straightforward:
1. Install the jumpers (usually all three of them) under each motor driver, in some cases they are already in place.
2. Install the five motor drivers and make sure that they are oriented correctly, as shown in the pictures below:

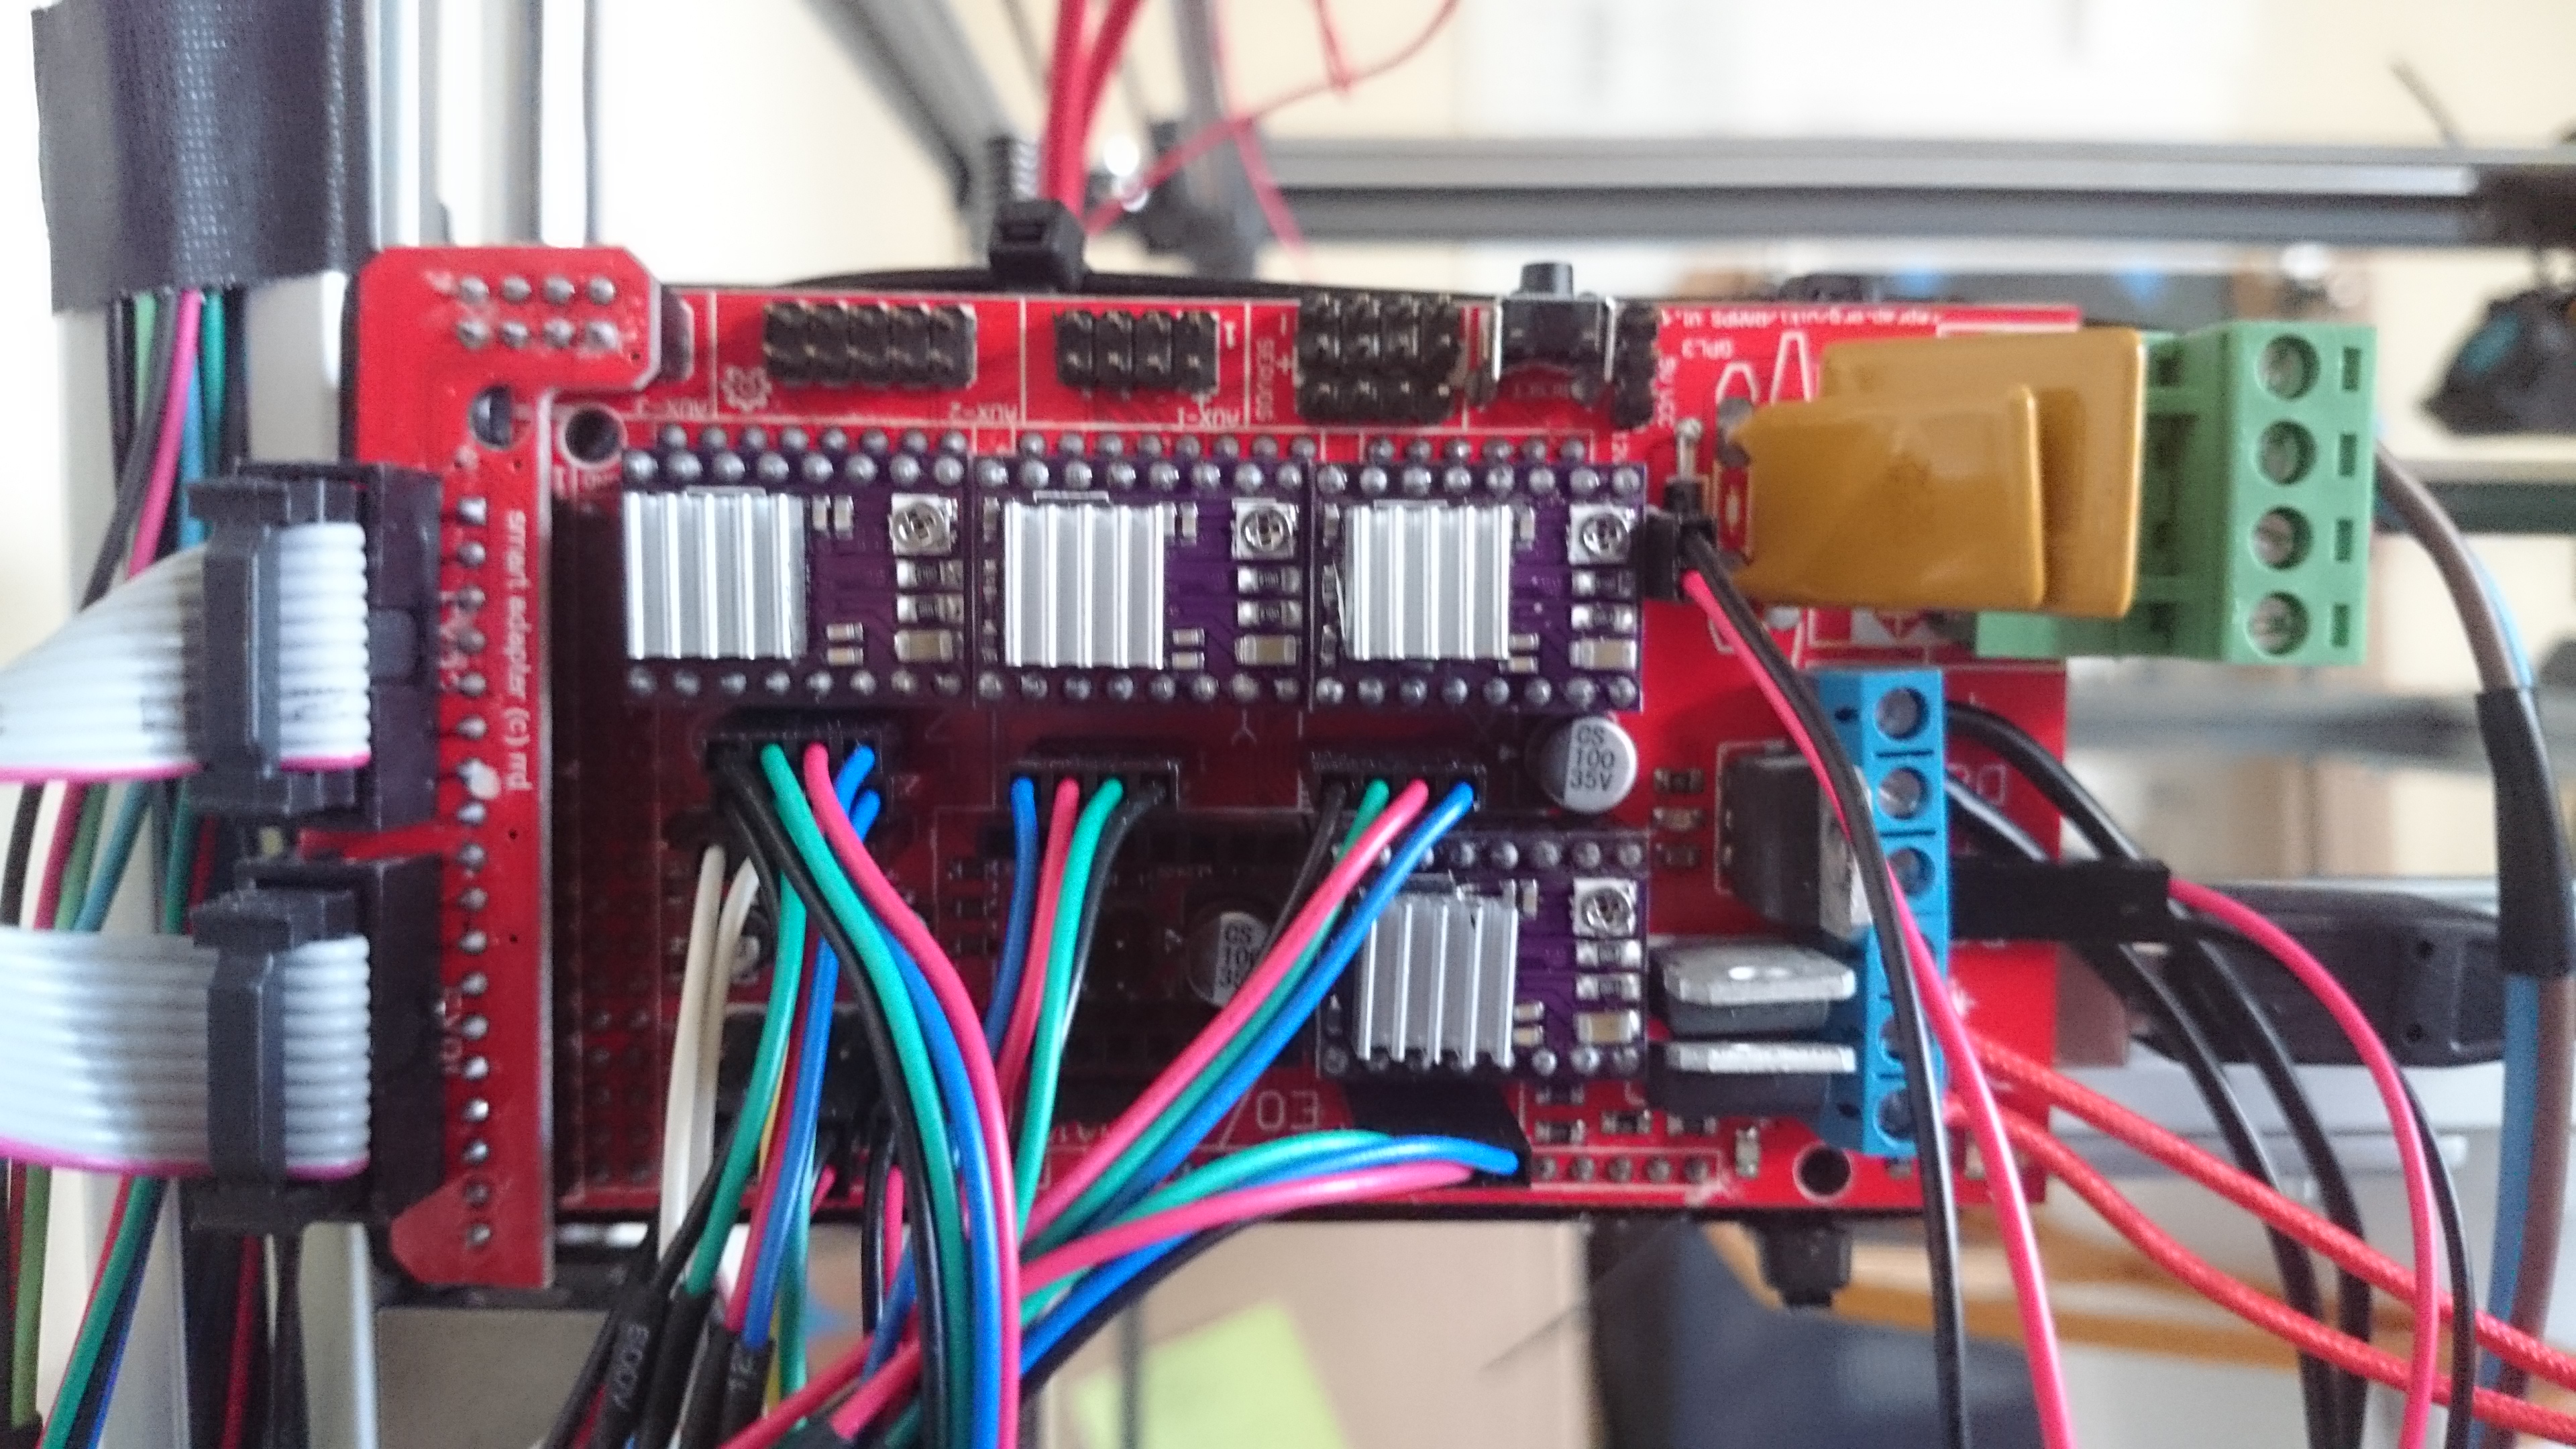
3. Install the display adapter board on top of the Ramps and connect the two ribbon cables to the display board as shown below. Once finished the result should look like this:

Firmware Upload
1. Download and install the latest Arduino IDE, connect your RAMPS/Arduino package to your computer via USB cable and and make sure you can upload code to the board: https://www.arduino.cc/en/Guide/HomePage the Blink example is just fine for now.
If you get error messages, double check that you have selected the right board type (Arduino/Genuino 2560 or MEGA 2560) and the correct serial port in the Arduino IDE.
Make sure you also install the U8glibary through the Arduino Library Manager. This library is required by the Marlin firmware to make our display controller work.

2. Download the latest version (Marlin 1.1.0-RC8 at the time of this writing) of the Marlin firmware from GitHub and unzip:
https://github.com/MarlinFirmware/Marlin (Clone or Download > Download Zip)
3. Open the file Marlin.ino using your Arduino IDE.

The Arduino IDE will automatically open all other files from the Marlin folder in individual tabs.
4. Click the tab labelled Configuration.h. We are now ready to configure the firmware so that it works with the RAMPS board and the display controller…

6. Edit the firmware configuration:
Find and uncomment (or add) the following lines in Configuration.h.
#define CUSTOM_MACHINE_NAME "Bauhaus Apparat"
#define DOGLCD // Full graphics display
#define REPRAP_DISCOUNT_FULL_GRAPHIC_SMART_CONTROLLER //add this line!
#define SDSUPPORT
#define REVERSE_ENCODER_DIRECTION
7. Save all changes, compile (“Verify”) and Upload to the board. Make sure you keep this copy of the firmare for the future. Some more modifications will be necessary to match your motors and the mechanical setup of your machine!
If everything went smoothly up to this point you should now be sitting in front of this:

If everything worked without any error messages up to this point, but your display remains blank: check the display-contrast potentiometer on the bottom left corner of the display board is dialled in to the right position.
Next week:
– Connect and test the stepper motors, sensors, endstops, heaters, etc…
http://reprap.org/mediawiki/images/6/6d/Rampswire14.svg
– Configure the firmware to match your specific mechanical construction…
– Run the first GCode from the SD-card…
– Control the machine via USB
Additional configuration tools:
Marlin Configurator:
http://www.thinkyhead.com/_marlin/
https://github.com/MarlinFirmware/Marlin/wiki/Marlin-Configuration
Mechanical calculators to obtain the correct numbers to configure motors, acceleration, etc.:
https://nathan7.eu/stuff/RepRapCalculator/RepRapCalculator.html
http://www.prusaprinters.org/calculator/
Example Configuration for RAMPS 1.4 with RepRapDiscount Full Graphic Smart Controller: Marlin-RC8.zip